
How to change your business settings
This is where your booking rules live: auto approval, slot intervals, cancellation policy, reminders, waiting list, and more. The screen most worth knowing.
Where to start
The menu at the top of the screen, then "Business settings"
Open the menu
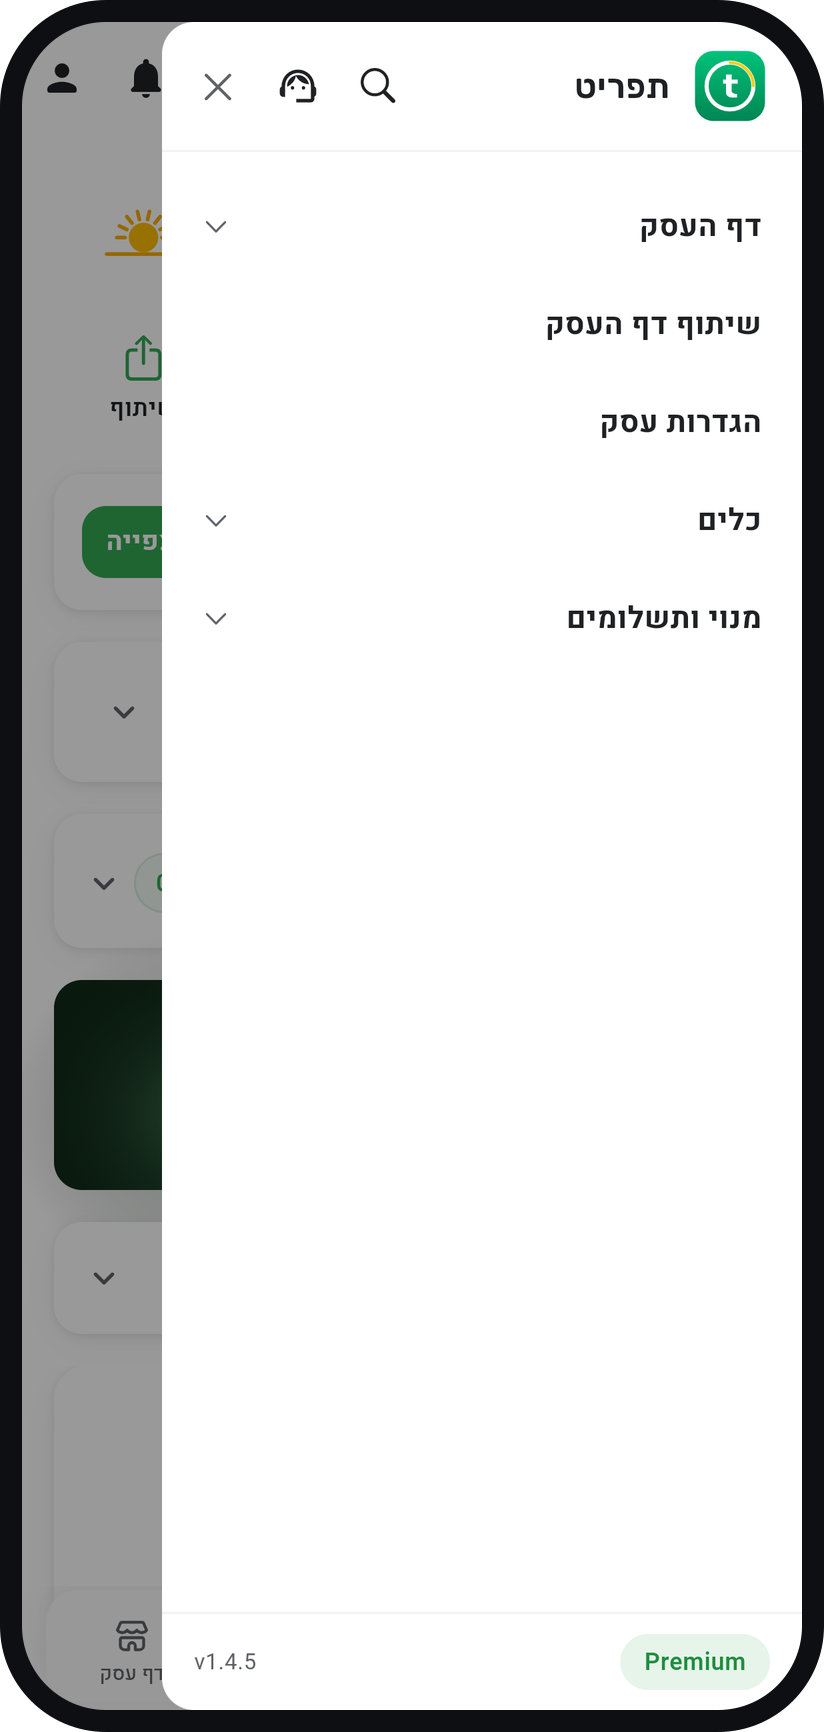
Tap the menu icon (three lines) at the top of the screen.
Zoom
The menu, with the "Business settings" row. Tap "Business settings"
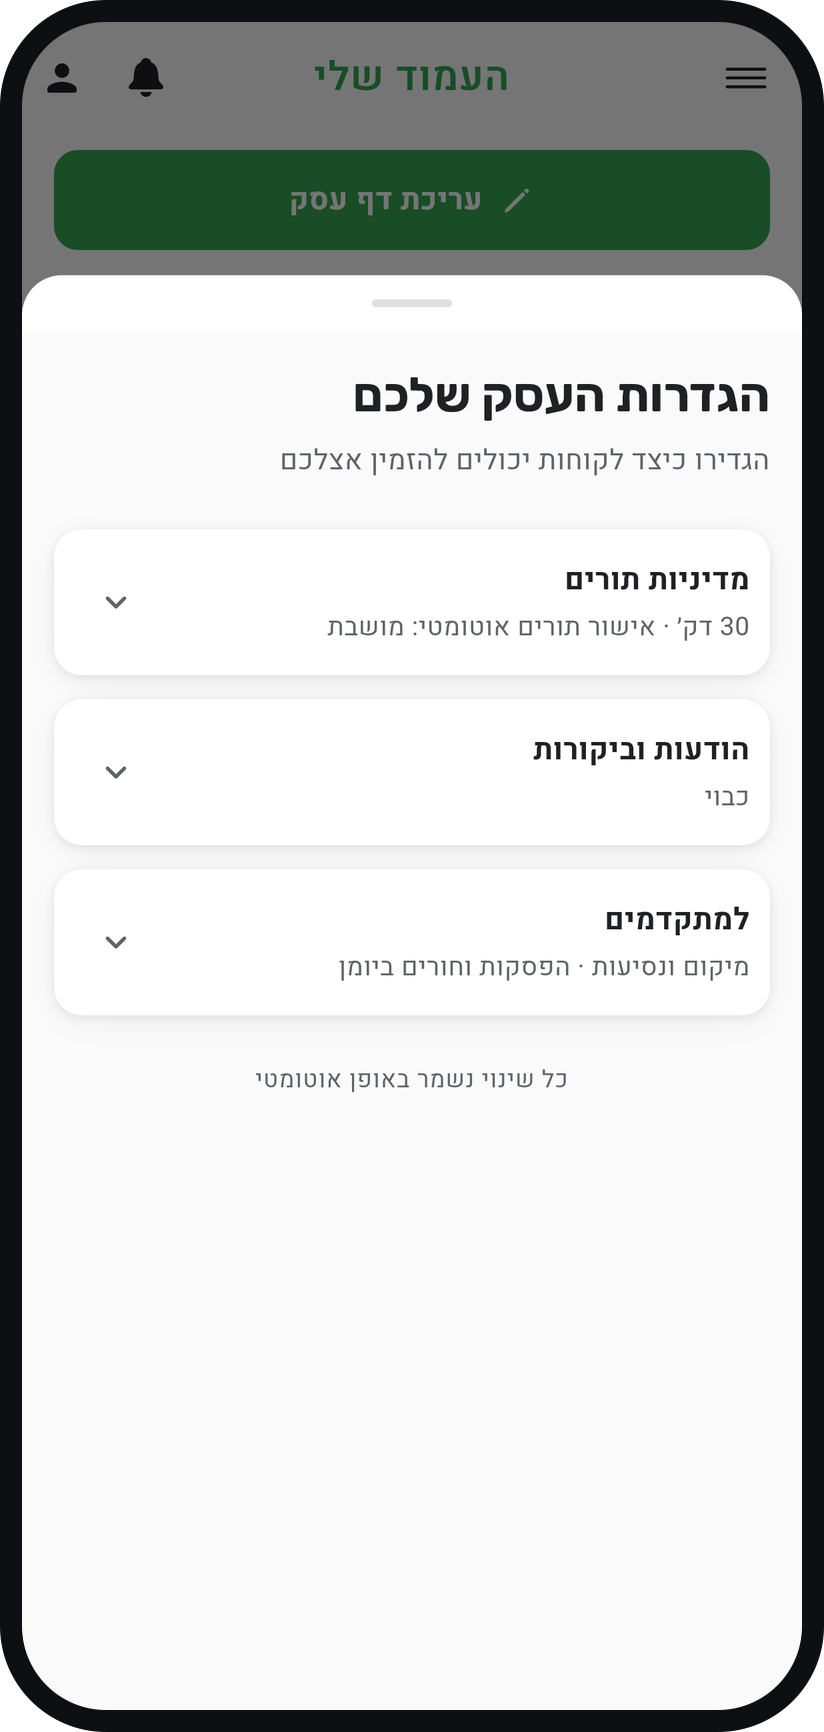
It opens "Your business settings", with three cards: "Booking policy", "Messages & reviews" and "Advanced". Tap a card to open it; every change saves at once, with no save button.
Zoom
The three cards of "Your business settings". Start with auto approval
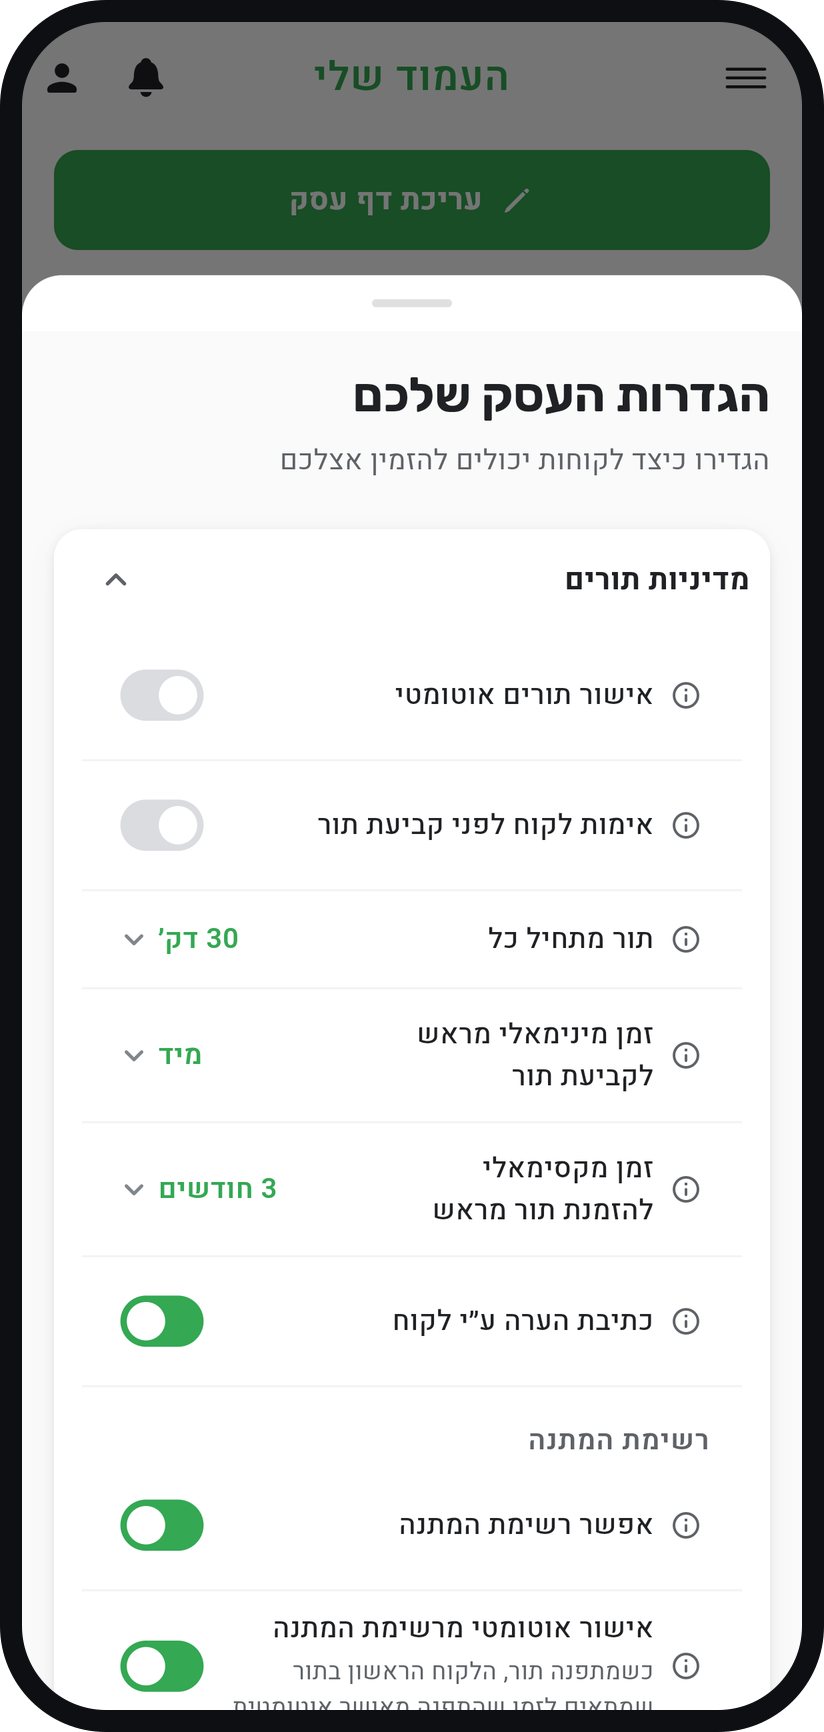
The first row of the "Booking policy" card is the "Automatic booking approval" switch. On, every booking enters your calendar immediately. Off, every booking waits for your approval in the "Requests" tab of the "Bookings" screen.
Zoom
The "Automatic booking approval" switch. Set the interval between appointments
The "Slots every" row sets the gap between the start times customers are offered. A 15 minute interval gives 10:00, 10:15, 10:30, while 30 minutes gives fewer choices and a tidier calendar.
Set how far in advance people book
"Minimum notice to book" sets how close to an appointment a customer can still book it, and the default is "Right away". "How far ahead customers can book" sets how far into the future they can go: from one week to a year, a number of days you choose, or "No limit".
Set a cancellation policy
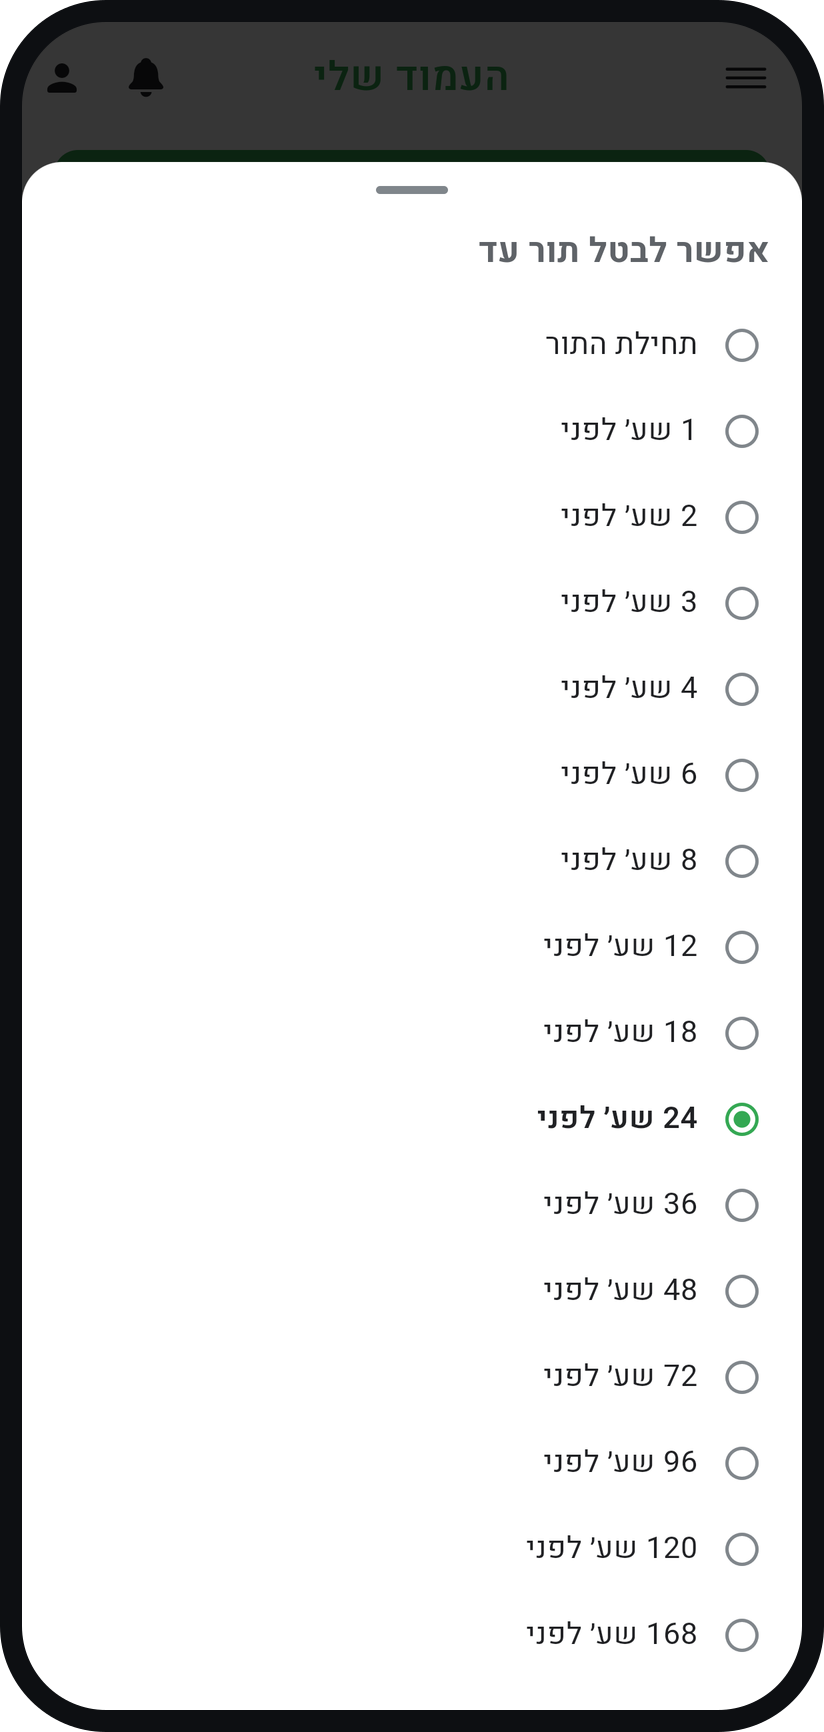
Under "Cancellations", the "Customers can cancel up to" row sets how many hours before an appointment a customer can still cancel or move it by themselves, or pick "the start time" to allow it right up to the start. Later than that, the customer is told your cancellation policy does not allow it.
Zoom
Choosing the cancellation window. Turn on customer reminders
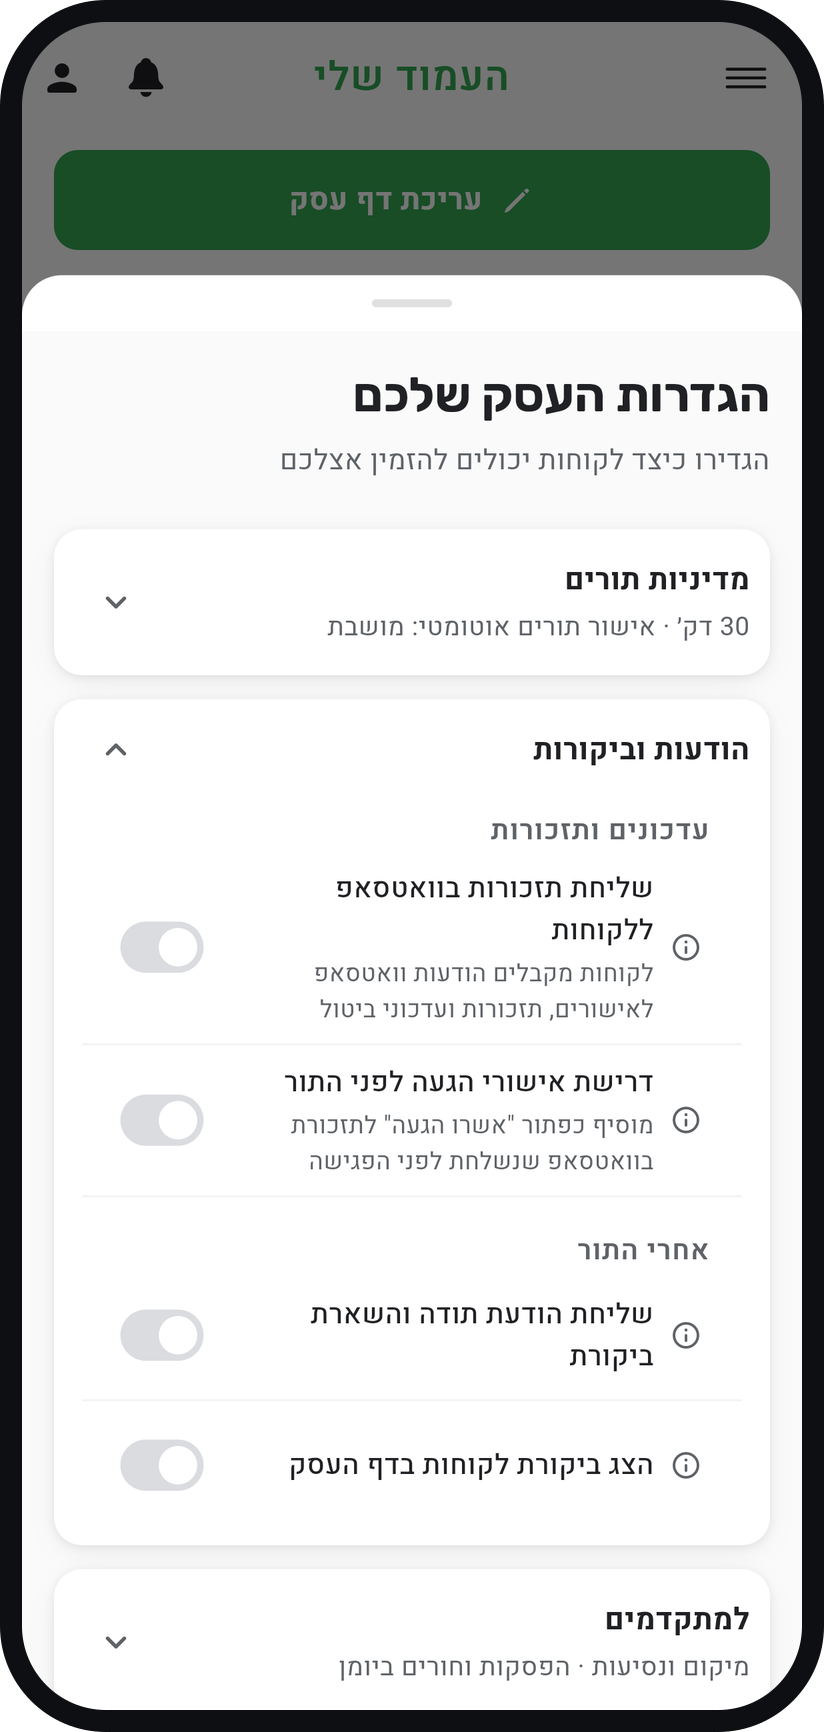
In the "Messages & reviews" card, under "Updates & reminders", switch on "Send WhatsApp reminders to customers" (Basic and above). This switch covers the customer's WhatsApp messages, such as confirmations, reminders and cancellation updates, and the "When to send the reminder" row under it sets how long before the appointment the reminder goes out, or "No reminder".
Zoom
The "Send WhatsApp reminders to customers" switch. Open "Advanced" when you are ready
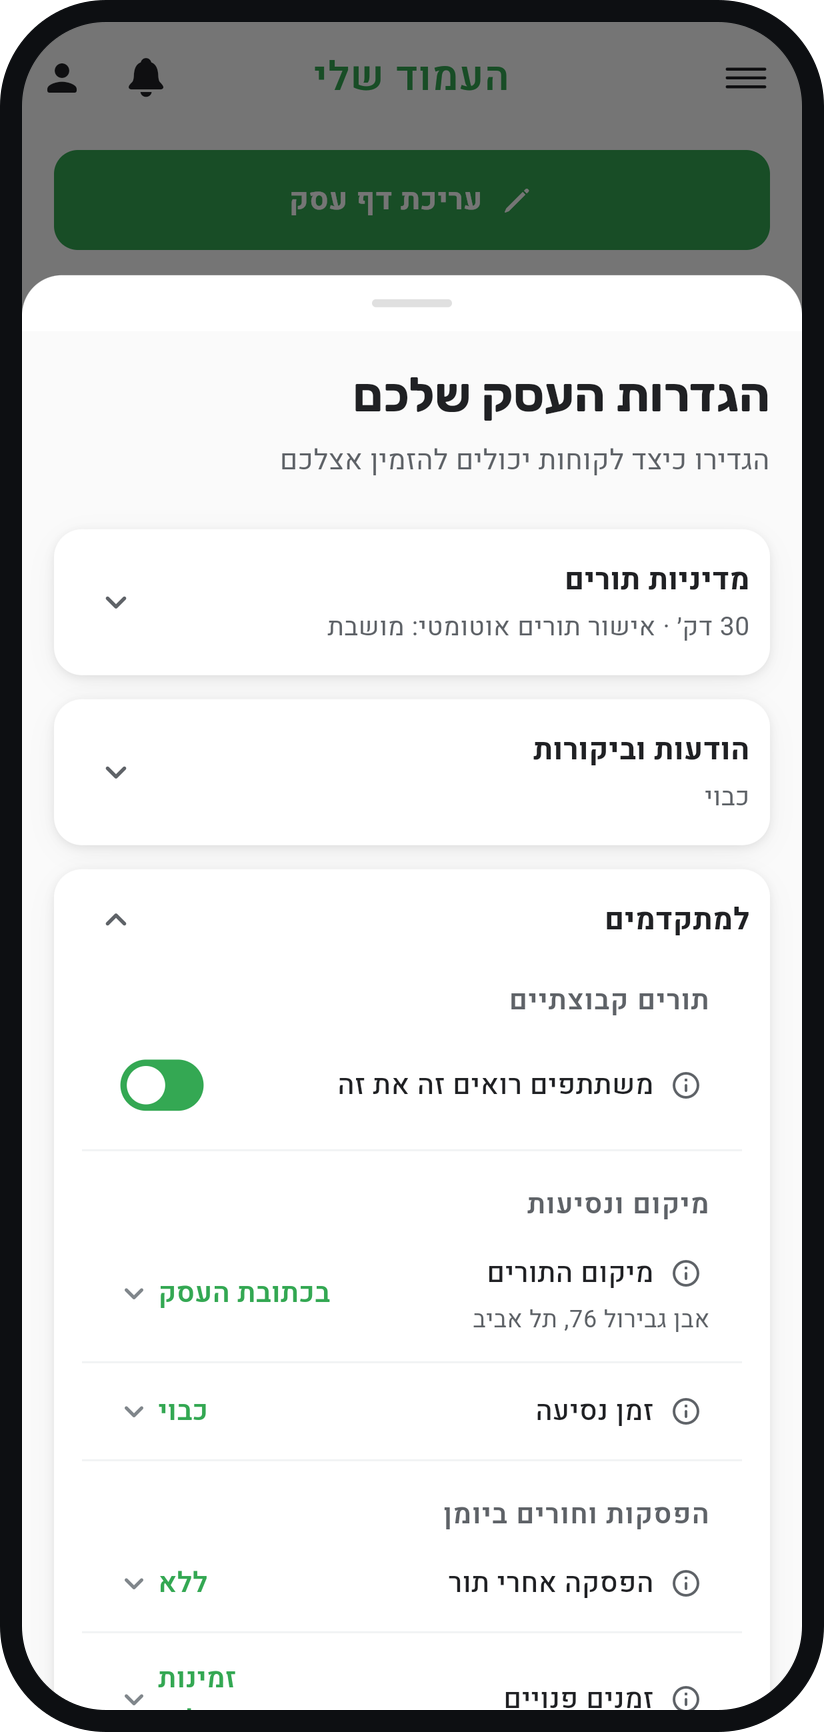
It holds "Location & travel" and "Breaks & gaps", with "Break time", "Free times" and "Gaps in the day". On Premium it also holds "Group sessions".
Zoom
The "Advanced" card.


Tips from the field
Most settings have a small info icon. Tapping it explains what the setting does without leaving the screen.
Business hours are not in this sheet. They have their own "Business hours" row in the "Business page" group of the menu.
"Customers can add a note" in the "Booking policy" card lets customers attach a short note to their booking, such as an allergy or a special request. You see it in the appointment details.
On Premium, a "Second reminder" row appears under "When to send the reminder": one more reminder at a different time, for example 48 hours and again 12 hours before.
"Break time" under "Advanced" adds a fixed rest after every appointment that customers cannot book. Useful when you need to tidy, clean, or just breathe between customers.
Common questions
A warning shows how many are waiting. "Approve All" turns auto approval on and confirms them all, while "Cancel" leaves the switch off so you can handle them one by one in the "Requests" tab.
The setting is included from the plan named next to it, and tapping the row opens a window with the plan details. Some options, like "Group sessions", only appear on the plan that includes them.
Appointments already in your calendar do not move. Booking rules like the interval and the booking window apply to new bookings, but the cancellation policy and reminders also apply to appointments already booked.
By default, yes: "Verify customers before booking" in the "Booking policy" card is on, so customers verify before the booking goes through. You can turn it off so a name and phone number are enough, but the app asks you to confirm, because it can lead to fake bookings.
More on this topic: Team & Staff Management
Related guides
Not using Timing yet?
Setting up in Timing takes a few minutes, and you can start free.