
How to approve booking requests
With automatic approval off, every customer booking waits for you in the "Requests" tab. You approve it, reject it, or change its length and price first.
Where to start
The "Bookings" tab in the bottom bar, then "Requests"
Watch the video
Open "Bookings"
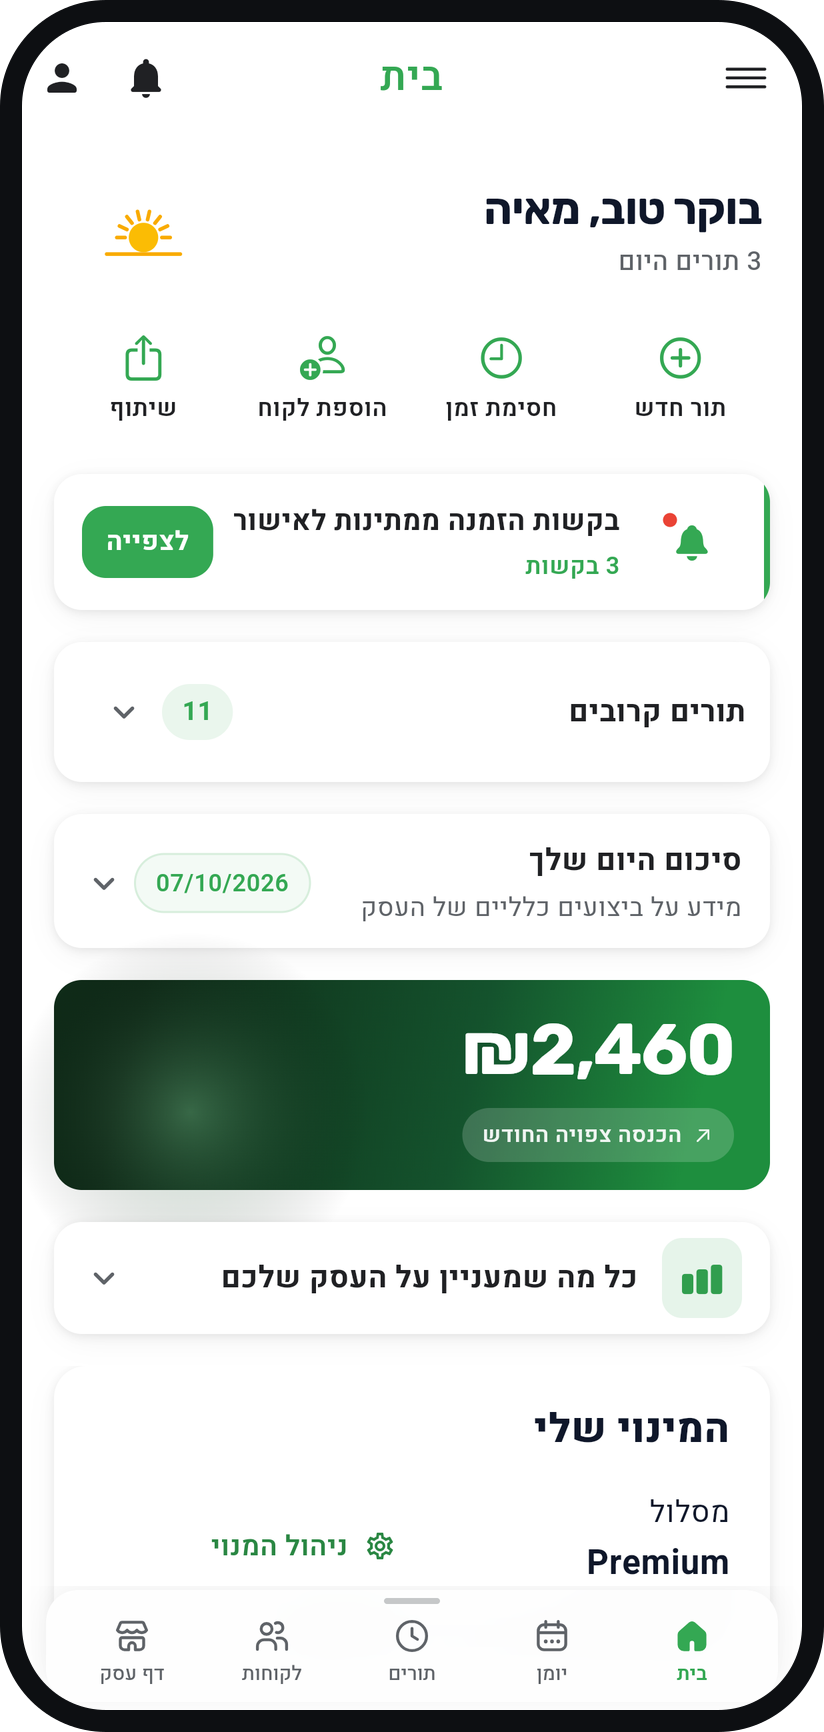
Tap "Bookings" in the bottom bar. When requests are waiting, the "Home" tab also shows a "Booking requests awaiting approval" card, and "Review" takes you straight to them.
Zoom
The "Booking requests awaiting approval" card on the "Home" tab. Go to the "Requests" tab
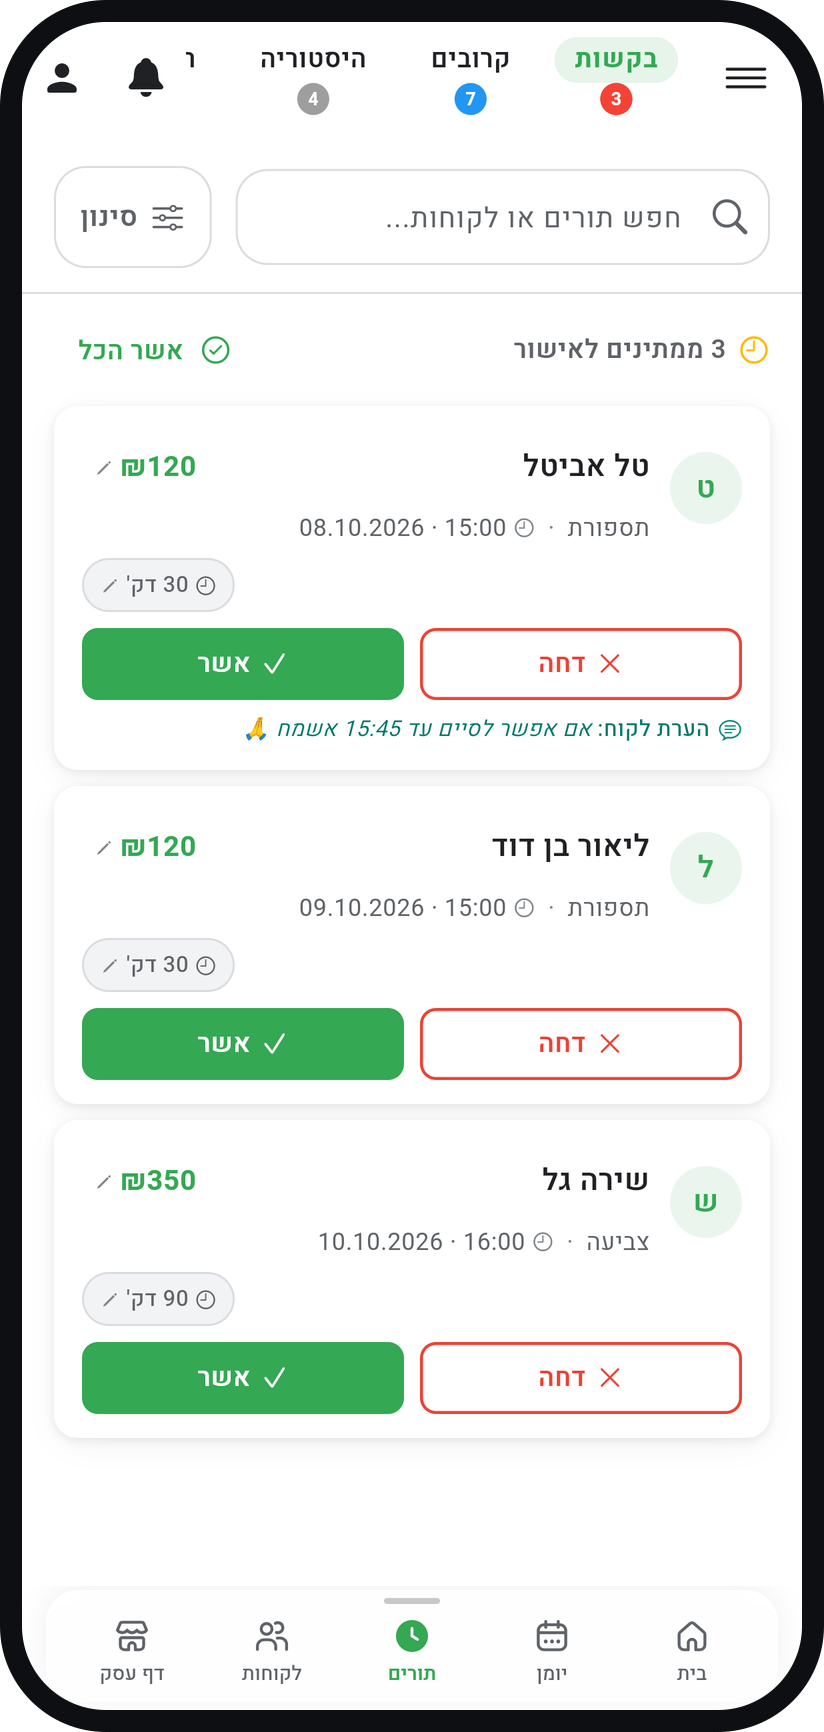
Every booking you have not approved yet is here. The tab shows while "Automatic booking approval" is off, which is how every new business starts.
Zoom
The "Requests" tab with the waiting requests. Check the request
Each card shows the customer name, the price, the service, the time and the date, plus a "Customer Note" if the customer wrote one. "Overlaps with another appointment" means the request clashes with a confirmed appointment.
Tap "Confirm"
The appointment is confirmed and shows in your calendar as a regular one. The customer hears about the approval according to the "Send WhatsApp reminders to customers" setting in "Business settings".
Or tap "Reject"
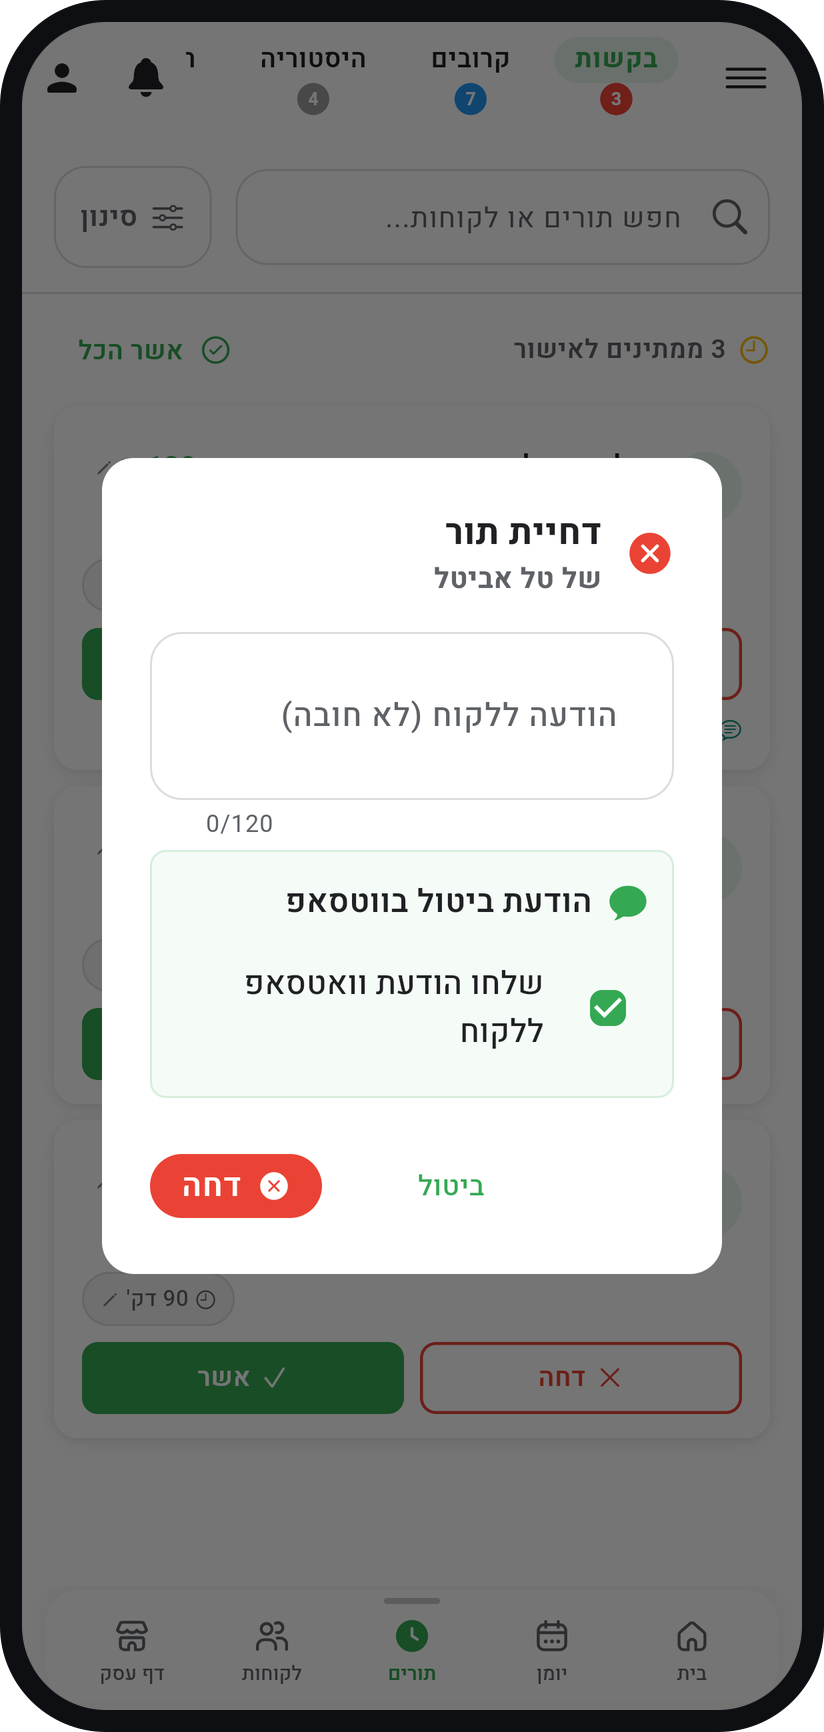
The "Reject Appointment" window opens, where you can write an "Optional message to customer". After "Reject" the request leaves the list and the time is free again.
Zoom
The "Reject Appointment" window. Change the length or price before approving
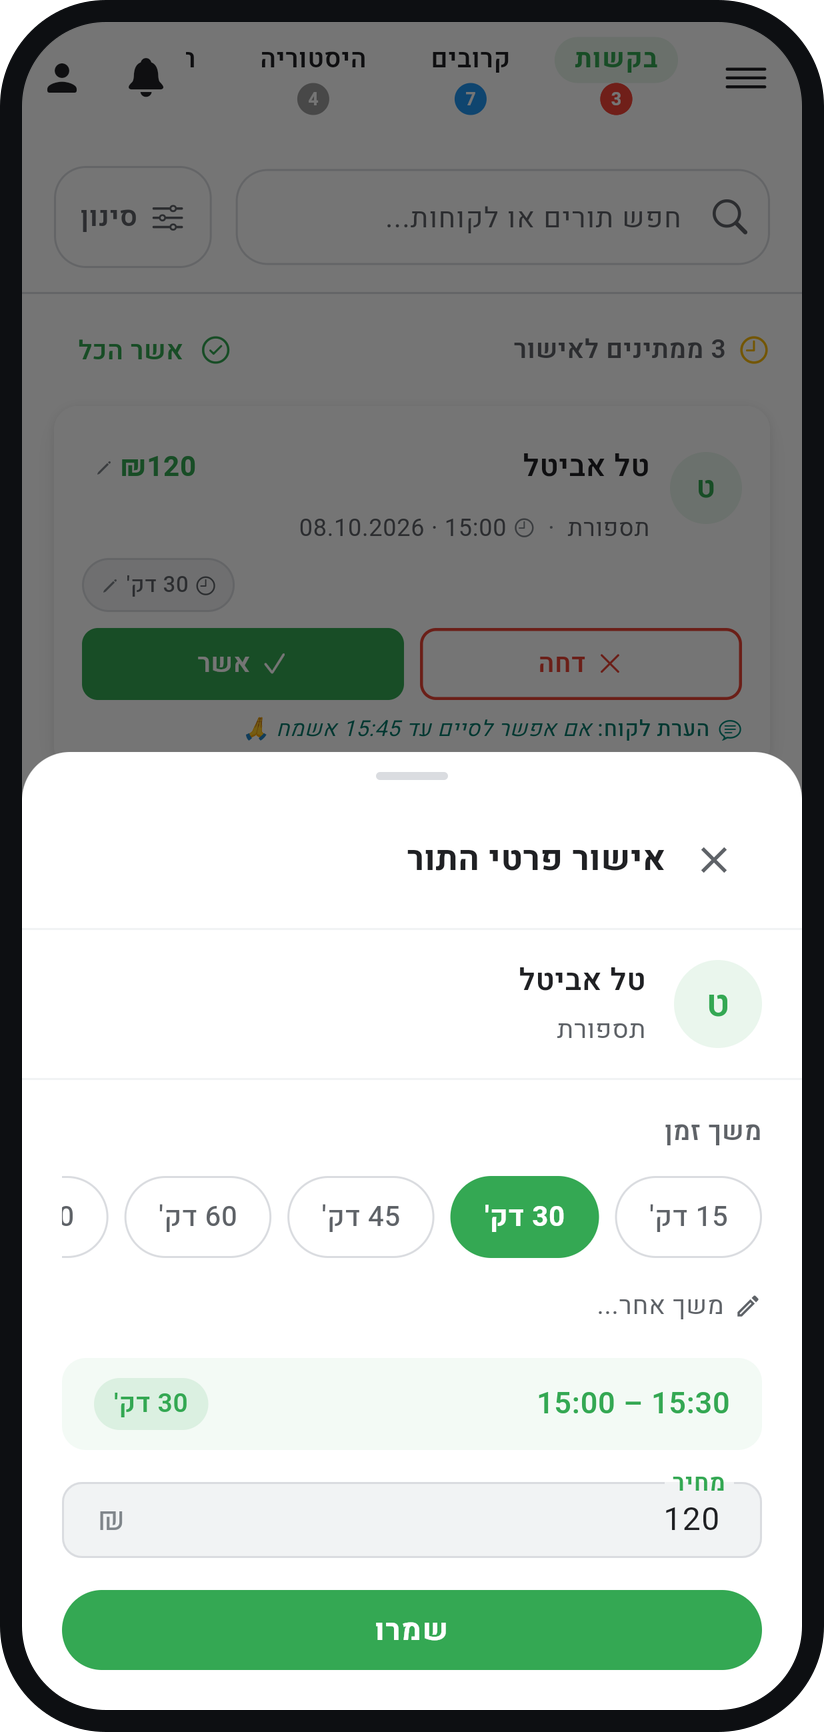
Tap the price or the duration badge (the clock) on the card. In "Confirm appointment details", pick a duration, update the "Price" and tap "Save": the appointment is approved with the new values.
Zoom
The "Confirm appointment details" window.


Tips from the field
"Approve All" at the top of the list approves every request at once, after one more confirmation. It shows when more than one request is waiting.
In "Confirm appointment details", a customer who has had the same service before gets a line about their last visit with "Apply", which fills in the duration and price from that visit.
Approving nearly everything? In the menu choose "Business settings", open "Booking policy" and turn on "Automatic booking approval". From then on every booking goes straight into your calendar, and requests already waiting are approved once you accept the prompt that appears.
When you approve in the "Requests" tab, the app checks that team member's appointments. If the request overlaps another of their appointments, "Duration overlaps next appointment" appears and nothing is approved: pick a shorter duration or deal with the other appointment first.
Common questions
Because "Automatic booking approval" is on, so every booking goes straight into your calendar. The tab also shows when your waiting list is on with "Auto-approve from the waiting list" off.
Until you handle it, or until its time has passed. Meanwhile it holds the slot so nobody else can book it, so it is worth clearing the list daily.
Yes, from the Basic plan: a reminder two hours after a request arrives, and another two hours before the appointment if it is still waiting (two that would land too close together become one). A summary of open requests also arrives at 21:00. Switch them off in "Notification Settings" in your profile, with "Remind me about unapproved requests".
Yes. After booking they see "Request sent", and the appointment shows "Pending approval" on their side. When you approve, they hear about it according to your message settings.
The customer moved an appointment you had already approved, so it is back for your approval at the new time.
More on this topic: WhatsApp Reminders · Attendance Confirmation
Related guides
Not using Timing yet?
Setting up in Timing takes a few minutes, and you can start free.